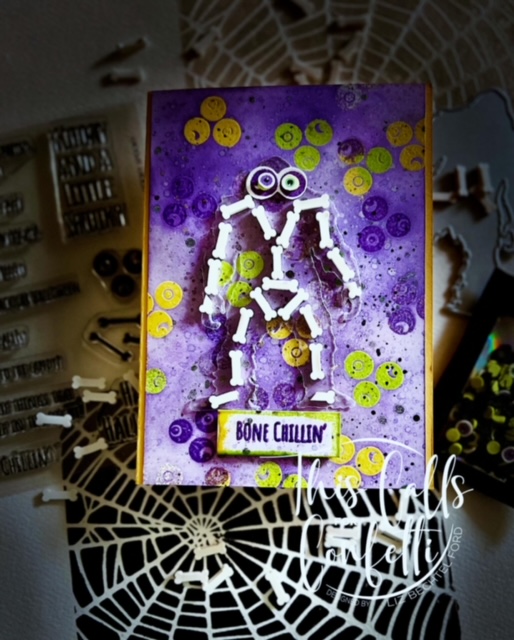
Bone Chillin' Adventure
Have you ever been on a hike in the forest and felt like there were a hundred eyes following your every move; making your bones rattle to your very inner skeleton core?
I feel like this Bigfoot could relate to your bone chillin' feelings.
This guy was just trying to get some exercise and well, he had to take a break due to the chill in the air!
Follow along with me, and I will explain how I crafted on up this eerie eyeball card to delight your 👀.
 |
| Die-cutting, embossing, and gluing with This Calls For Confetti Products |
First off, I cut a panel of Bristol smooth cardstock and inked it up with some purple hues of Distress Inks.
Then I splattered some of the purple distress inks onto the panel by inking up a small portion of a clear acrylic block and spritzing it with water. I dipped a paintbrush in the mix, held it over my splatter box, and splayed the hues over the panel. Also applied a few gold splatters from #903 from the Kuretake Starry Colors God Metallic Paint Set.
You will notice, that it is a titch smaller than an A2 panel. I wanted to have the yellow cardstock peek thru and compliment the purple and yellow/greens used.
 |
| Cardstock panel and ink hues used |
Next, I stamped the trio of eyeballs atop the panel in Versamark ink. Using my stamp positioner for this task made it easier to vary up placement atop the panel. Additionally, it allowed me to sprinkle the various embossing powders one hue at a time before heat setting.
 |
| Kooky Spooky 'eyeball' trio stamped onto panel with VersaMark ink |
The 👀👀👀 were coated in the following embossing powders:
 |
| Wild Honey, Purple, and Twisted Citron Embossing Powders |
Once the heat setting was done, more ink was splattered onto the panel. Mainly used were green(s), gold, and black. While the panel was drying, I die cut the acetate sheet with the Bigfoot metal craft die. I ran it through a few times to ensure that the acetate would cut out. I was worried that his fingers would not cut properly but they did.

I debated on gluing the bones atop or under the acetate for the best skeleton view. In the end, I felt that the skeleton would look better on top of the acetate bigfoot.
With some Bearly Arts Glue in hand, & carefully holding each single bone with my tweezers I applied glue to the bottom of it, before placing it back on/in my bigfoot skeleton.
I laid out my design before commencing with the gluing, so that he would be a solid skeleton structure. I left room for the 👀 at the top. I ended up gluing more eyes on top of the embossed eyes. 👀 guess you could say 👀 went overboard!

After I got all the bones on, I gently placed a clear acrylic block atop the bones so that they would be set into place. Then I repeated the process once I glued the acetate bottom (cleverly under each bone so glue would not show thru) and placed the acetate bigfoot atop the panel.
Very last touches to the card were to pop the sentiment up on the card with some 3M foam after heat embossing the sides of the sentiment. The inside of the card also has a sentiment stamped in Villainous Potion.
 |
Here is one last 👀 look at the card:


Comments
Post a Comment